

Congratulations! You managed to hunt something.
Unfortunately, your kill might leave you with way more meat than you can handle. It’s a common issue with larger game like the white-tailed deer, which yields around 52 pounds of venison and can feed over 200 people.
Unless you’ve got a few hundred hungry friends waiting around, you need to preserve most of the meat for later.
Freezing is the obvious method, but what if you don’t have a freezer?
Never fear. There are several alternative methods available. These range from quick and easy field techniques to more time-consuming culinary endeavors.
One thing you can count on is that they all provide a satisfying, protein-packed meal when you need one.
1. Pressure-Canning
Every homestead should have a pressure canner. Once you know how to can, it’s the simplest and most foolproof method to preserve your meat without refrigeration.
If you’re new to the idea, check out our pressure-canning guide to see what the process entails. Here you’ll find tips, tricks, and sage words of advice.
Check out this video for a breakdown of basic pressure canning.
Pressure-canning uses heat to sterilize food within a jar. It also seals the jar shut and prevents bacteria from entering.
The USDA states that canned meat can stay good for up to five years, though you should use your best judgment when it comes to food safety. Depending on your circumstances, you might get away with more or less time.
Keep in mind that pressure-canning is not the same as water-bath canning. The water-bath method is unsuitable for meat, as meat contains low levels of acid and will spoil without the pressurization process. So if you don’t have a pressure canner, you’ll need to buy one—but it’s a worthy investment to make.
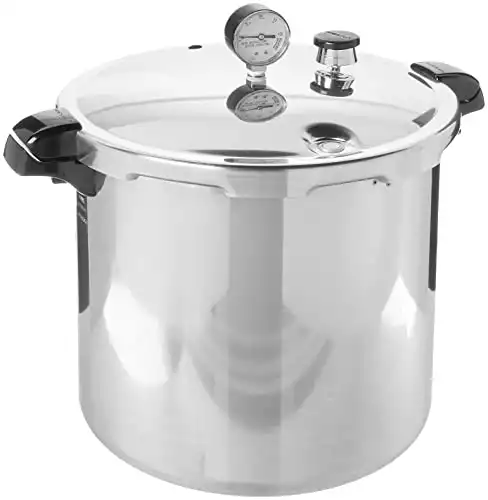
One of my favorite canners is the Presto 23-Quart Canner. It will work on any stovetop, including gas, electric, and induction. It’s easy to learn with and great for beginners.
Plus, you can use it for water-bath canning as well as pressure-canning. This particular unit can process up to seven quart-sized jars at one time. It isn’t huge, but bigger models will cost a lot more.
Pros
- It’s an easy and simple method once you learn it.
- It’s relatively fast at 100 minutes per batch.
- Your meat can last five years or more.
Cons
- It requires a pressure canner.
- There’s a learning curve.
- It must be done on a stove.
2. Dry Salt-Curing
Salt-curing fresh meat is a method people have used for thousands of years. The curing process works through osmosis, which is triggered when salt is applied to meat.
The salt penetrates deep within the flesh and dries out each cell in the muscle. Remember what happened when you poured salt on that snail? Yep. The same thing will happen to your game.
Learn how salt preserves meat and get some helpful tips on salt-curing.
There are several ways to salt-cure your meat, but dry-curing is best for when you don’t have refrigeration. The process entails rubbing your meat in a ridiculous amount of salt, then hanging it to cure in a cool, dark place. Alternatively, you could bury your meat in salt within a cure box.
Depending on your specific conditions, the meat can take weeks to cure fully. The more humid, dark, and dank your environment, the better.
How long before it spoils? It all depends on the conditions, but some cuts have been known to last for years once cured.
In modern times, we know that adding additional ingredients like nitrites can help kill off bacteria and extend the life-span of meat even further. However, it can be difficult for beginners to create a perfectly optimized curing mixture for preservation.

A product like Anthony’s Pink Curing Salt #2 can help. This mixture is specially formulated to preserve meat over an extended time, enhancing the flavor and keeping your game good for longer. I like Anthony’s because it’s designed to be used without refrigeration. So, you can salt-cure your meat, hang it up to dry, and eat it immediately after it appears moisture free.
Pros
- It requires no special equipment.
- It requires no electricity.
- Your meat can last up to a year or more.
Cons
- Meat spoils quickly if brined incorrectly.
- Your meat can taste salty.
- Your meat may take a long time to cure.
3. Brine-Curing
Brine-curing works much like dry-curing, as it uses salt to prevent the growth of bacteria. The main difference is that while dry-cured meat is rubbed in salt and hung to dry, brine-cured meat is submerged in a saltwater mixture and stays wet the entire time. Brine-curing is much the same as pickling, except you don’t use sugar or vinegar. This method is often used for pig’s feet, but you can brine any meat.
Brining has been used for centuries and was especially popular on long sea voyages where salt was abundant, and refrigeration was nil. It’s simple, easy, and nearly foolproof—just mix up a solution of salt and water. You’ll need about a pound of salt for every three quarts of water.
Brining with pickling salt is better than brining with regular salt because pickling salt doesn’t have any additives that can mess up the brining process.
If you’re looking for a reliable salt, Morton’s Pickling Salt is a great choice. It’s economical and additive-free, plus it comes in a four-pound box so you can brine bigger batches of meat. Just submerge your fresh meat in the water, cover it with a lid, and store it in a cool, dark place.
Brined meats can last for months if stored correctly.
Pros
- It’s inexpensive.
- It’s a simple and easy process.
- It makes you feel like a pirate.
Cons
- Your meat can turn out very salty.
- It has a high potential for spoilage if done improperly.
- Brining meat can stink up your house.
4. Dehydrating
Dehydration is the process of removing water from meat, which prevents bacteria from growing. You can dehydrate easily using the sun or your oven. Alternatively, you could use an electric dehydrator or freeze-dryer. What you’ll wind up with is basically jerky.
Fat causes meat to deteriorate quicker, so dehydration works best with low-fat cuts. You’ll need to cook your meat to 158°F or above to kill off E. coli and salmonella bacteria, then slice the meat as thinly as possible.
You can sun-dry your meat if you live in a sunny and dry climate. Otherwise, you’ll need to oven-dry it. Once it’s dry, you can store your jerky for up to 12 months in an airtight container without refrigeration.
Freeze-drying units cost thousands of dollars, rendering them impractical for most people. But if you hunt often, investing in a regular dehydrating machine might be worth it. There are several great food dehydrators on the market these days. One of my favorites is the Excalibur 9-Tray. This isn’t the cheapest option, but it’s incredibly useful and versatile.
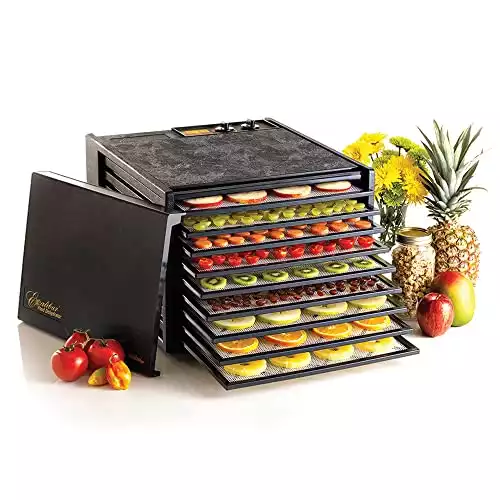
You can dehydrate larger amounts of meat on it, as the trays are over one square foot and can hold up to 7.7 pounds. You can also dehydrate fruits, veggies, and all sorts of foraged goods.
Pros
- It’s a versatile process with various methods.
- Dehydrated meat can last up to a year or more.
- Any animal can be turned into jerky.
Cons
- Meat takes a while to dehydrate.
- It can be difficult to tell if meat is fully dried.
- There’s a steep learning curve to proper dehydration.
5. Cold-Smoking
This method uses smoke to dry out the meat, essentially dehydrating it for preservation. Smoke particles also contain antimicrobial properties that destroy bacteria and help extend shelf life. To cold-smoke meat, you’ll need an indirect heat source that directs smoke over your game.
While cold-smoking dries the meat and inhibits bacterial growth, the meat still isn’t technically cooked to the FDA’s “safe zone.” For this reason, it’s a good idea to combine cold-smoking with a curing method like dry salt-curing. It is possible in some circumstances to cold-smoke meat without curing it first, but this is better done by experienced smokers.
Read: Smoking food for beginners
You can cold-smoke over a campfire if the situation calls for it.
If you want to try cold-smoking, be aware that it takes time and effort to get right. You need to cure butchered meat with salt or brine beforehand and cold-smoke it for 12 to 24 hours. But it’s the best method for flavor. Different types of wood impart different tastes and aromas, and it can be fun to mix and match to see what you love.
You’ll need a cold-smoking setup to get started. You can dig one out in your yard or modify your current smoker by placing the meat away from the heat source.
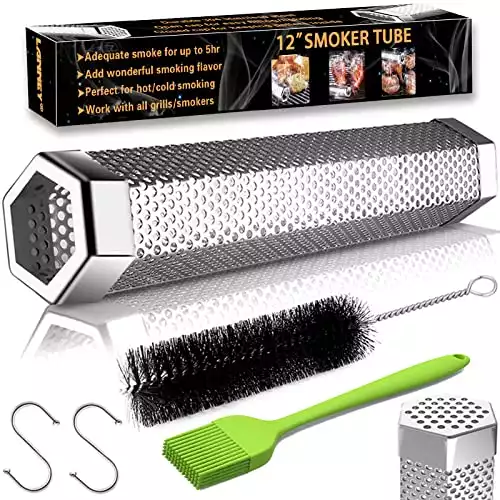
An alternative is to buy a smoker tube like the Lanny Smoker Tube. These tubes are filled with flavorful wood chips or pellets and provide hours of billowy smoke to preserve your meat.
They are versatile and can be placed right inside your current grill or smoker. You’ll need to replace the wood chips when they run out, but it’s a small price to pay for simplicity.
Pros
- Your meat will have a delicious flavor.
- There’s room for creativity and flair.
- It works with any meat, fish, or cheese.
Cons
- It usually requires curing first.
- Health safety hazards exist.
- It takes a long time.
6. Making Confit
While confit may conjure up visions of fancy French restaurants, its roots are actually quite humble. This delicious dish originated in medieval times as a way to preserve meat before refrigeration existed.
Confit requires you to submerge salted meat completely in fat, cooking it low and slow. The fat eventually gets rendered and forms a protective barrier against bacteria and spoilage.
It takes a while to make confit because you have to cook it on such low heat. You don’t necessarily need a stove for this method, but you’ll need to tend a fire for several hours if you don’t have one. Once your meat is cooked, let it cool. Then, pack it into jars and cover it completely with rendered fat.
Confit is salted heavily beforehand to help cure and preserve it. Evidence suggests that it can last several months when properly prepared and stored. Confit was traditionally made with duck or fowl, but you can also make it using other game.
Pros
- It’s insanely delicious.
- It’s relatively easy to prepare.
- You can brag about your fancy food.
Cons
- It requires lots of fat.
- It requires three to six hours of slow rendering.
- It can taste salty.
7. Making a Zeer
A zeer is a type of DIY refrigerator first used in North Africa long before anyone had electricity. It turns out making a zeer is an easy, simple process—all you need is two large clay pots, sand, cloth, and water.
Stack one pot inside the other, with the sand sandwiched between the two. Then pour water on the sand and cover it with a wet cloth.
Check out this tutorial to learn how to make a zeer and if it can be useful in your area.
As the water evaporates, it cools down the inside of the pot. The downside is that a zeer can only get your meat so cold. It isn’t a long-term preservation option, but it could extend the shelf life of fresh meat for several days.
I have used a zeer in conjunction with dry salt-curing to preserve meat in tropical environments, where the humidity makes drying difficult. If a zeer isn’t your style, there are other options for off-grid refrigerators. It just depends on whether you want to devote time or resources to building these units.
Pros
- It’s easy to make.
- It’s portable.
- It’s made of cheap materials.
Cons
- It cannot preserve fresh meat for more than a few days.
- It uses up a lot of water.
- You’ll be constantly refilling water reserves.
8. Burying Meat
Burying meat is probably the oldest meat preservation method in the world. By burying meat, you limit exposure to sunlight and air that encourage bacterial growth. The pH level in the soil can also act as a preservative, as can the cooler temperature away from the sun.
If you want to try it, dig a hole a few feet down in dry soil. Choose a cooler, shaded area. It’s better to bury meat in conjunction with dry salt-curing or smoking. Otherwise, your meat will spoil within a few days. Even with optimal conditions, burying meat is not a long-term option for preservation.
Pros
- It’s easy.
- It’s quick.
- It’s free.
Cons
- Your meat will still go bad relatively quickly.
- Scavengers can steal your meat.
- Your meat can get dirty.
Remember, there are plenty of options available no matter your resources. Those who appreciate tradition can rely on salt-curing or canning, while people who have a taste for the finer things can get creative with confit or smoking.
Now that you know eight ways to preserve meat without refrigeration, you’ll be able to enjoy it all year long.
Related
Also read how to preserve meat in the wild.


 Uses And Benefits")

 NSN: 1240-99-984-0230")
