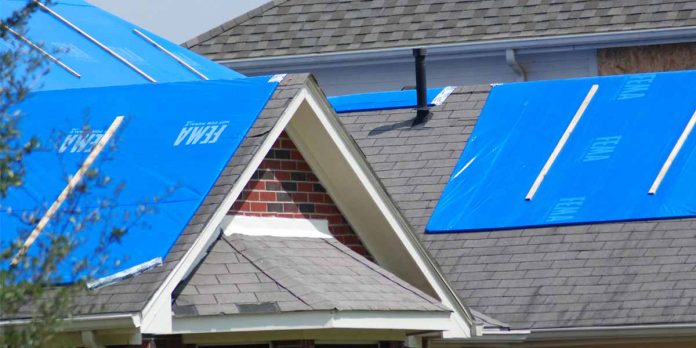
Along with boarding up a window, tarping a roof is an important skill to know for disaster preparedness.
If a hurricane blows off part of your roof, it can let rainwater through. The next thing you know, you don’t just have a damaged roof but also severe water damage.
Luckily, it’s fairly easy to tarp a roof. All you need is a large tarp or plastic sheeting. Depending on the roof type and the method you use, you may also need a putty knife or trowel, cap nails, and/or wooden boards.
Also read: Prepper Supplies List
Notes:
- Make sure the roof is safe to go on before tarping it. If you suspect that the roof beams are damaged, or the roof isn’t stable, do not risk going up!
- Before starting, take pictures of the roof for insurance purposes.
Method 1
- Clear debris from roof.
- Loosen shingles: Locate the shingles 2 or 3 rows above the damaged area. Using a putty knife or trowel, lift the shingles just enough so you will be able to slide a tarp underneath them. Do this on the shingles above the damaged area and extending 2 feet in both directions.
- Slide tarp underneath the shingles you loosened.
- Hammer cap nails into the shingles to hold the tarp in place.
Method 2
- Place tarp over roof ridge so it covers the damaged area. Even if the roof is only damaged on one side, the tarp must be hung over both sides of the ridge. Otherwise water will flow underneath the tarp.
- Place wood boards over edges of tarp.
- Hammer nails through the boards to secure the tarp in place. If you hammer nails directly into the tarp, the tarp will likely rip and fly off the roof.


