
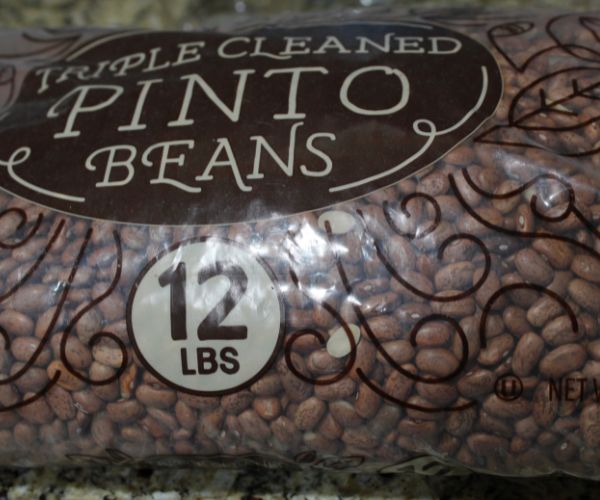
Many survivalists and preppers stock up on beans because of their long shelf life, but the drawback is that they take a long time to cook. In most survival situations, time is not your friend.
Pressure canning beans in advance is a great way to have the benefits of their shelf life while exchanging the time factor for convenience. However, those not familiar with pressure canning might find this process a little intimidating.
Rest assured, it’s a relatively safe and easy process so long as you follow the rules of the National Center for Home Food Preservation and read our guide to pressure canning for beginners.
Warnings: People often confuse pressure canning with pressure cooking. Before you begin, make absolutely sure you have a pressure canner. Additionally, despite what some will tell you, the National Center for Home Food Preservation does not approve of water-bath canning with beans or other low-acidic foods, like meats.
How to Pressure Can Dried Beans – Step by Step
- Soak and precook.
- Gather and prepare all your equipment.
- Fill your jars.
- Vent and build pressure.
- Process your beans.
- Cool your beans.
- Prepare your beans for storage.
Soaking and Precooking
All beans require an added measure of preparation that most low-acidic foods don’t. They must be soaked before canning. This is a mandatory process that should not be skipped, but don’t over-soak them.
Some people say it’s okay to skip this step, but the NCHFP does not. Rehydrating beans allows them to expand to their full size, which prevents overflow and siphoning. It also helps remove any excess starch that could interfere with proper sealing.
Sort out approximately 6 ounces of beans per pint or ¾ pound per quart, rinse, and submerge them in water. Remove and discard any that float to the top.
There are two approved steps for rehydrating your beans.
- Overnight soak: Place your submerged beans in the refrigerator for 12–24 hours. I usually do this the evening before I plan on canning. Just before bed, I’ll check to see if they need any additional water added.
- Quick soak: Done the same day as your canning. Place your beans in a pot, cover them with water, and bring them to a boil. Boil them for two minutes and then remove them from the burner and allow them to rest for one hour.
One method is not necessarily better than the other, although some people claim their beans become too mushy with the overnight soak. It’s really a matter of preference. I choose the overnight soak to save time because canning is already such a long process.
With either method, after their allotted soak time, rinse your beans thoroughly to get rid of any excess starch. Cover them with water again and boil for 30 minutes. I typically perform this step while I’m setting up my canning equipment.
Gathering and Preparing All Your Equipment
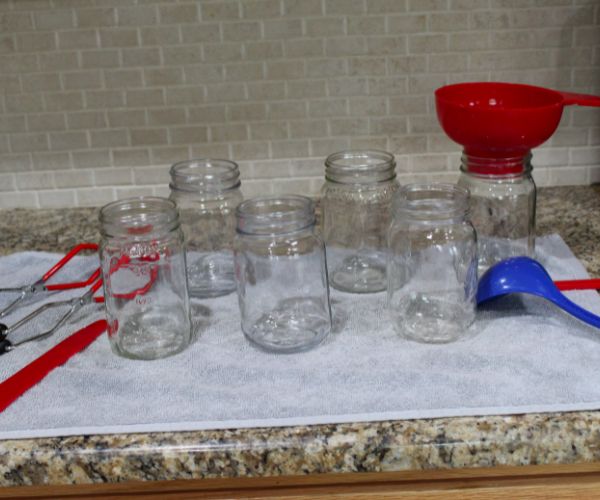
While your beans are boiling, gather all your canning supplies. This way, when your beans are done, you have everything you need to place them directly into their jars for processing. Here’s what you’ll need:
- Canner
- Jars
- Lids and bands
- Towels and oven mitts
- Pot for canning lids
- Pot or kettle for water
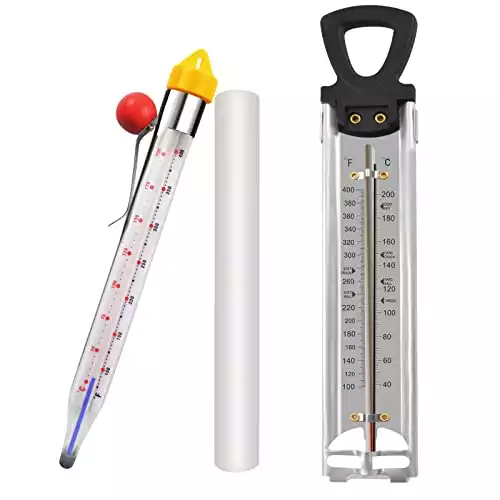
- Thermometer (optional)
- Canning funnel
- Ladle
- Lid grabber
- Jar lifter
- Headspace tool
- Rag
- Vinegar
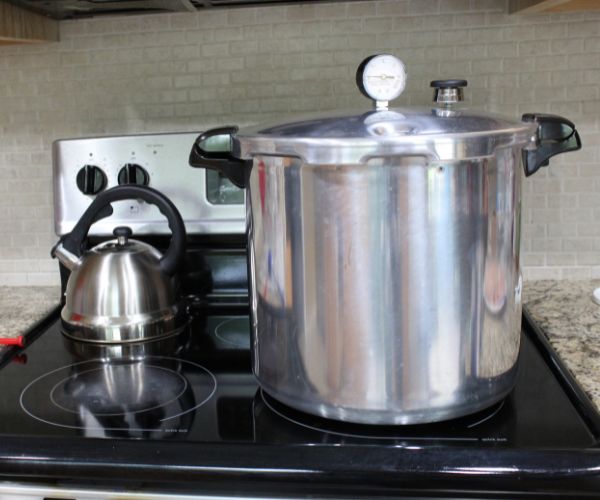
Every pressure canner is different and you must follow the specific instructions for your canner. I have a Presto Pressure Canner, so the following instructions apply to this canner.
Prepare your pressure canner by placing the canning rack inside. Add 3 quarts of water and 2 tablespoons of vinegar. Begin heating the water to around 180 degrees. I typically use a candy thermometer to monitor the temperature.
Getting the water just below boiling helps pressurize your canner quicker and prevents your jars and food from getting cold.
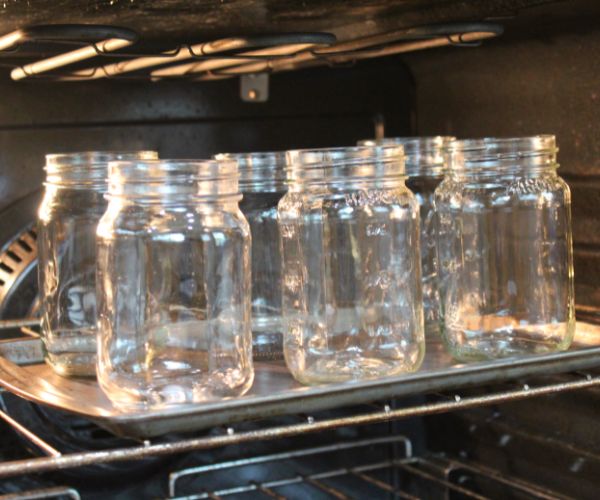
While your water is heating, preheat your oven to its lowest temperature setting and inspect all your jars and lids for the following flaws and weaknesses:
- Chips
- Cracks
- Rough edges
- Bends
- Dents
- Rust
Preheat your jars in the oven to avoid any sudden temperature changes that might contribute to jar breakage.
Place your lids in a pot of hot water to soften the adhesive and prepare them for a proper seal. The NCHFP recommends you only use new two-piece lids. Other other experienced canners disagree and believe it is safe to reuse canning lids.
Because of the high temperatures involved with pressure canning, there is no need to sterilize your lids or jars.
You’ll also need to heat some water to ladle over your beans after transferring them into your jars. I usually place all my other canning utensils within arm’s reach near my workspace.
Filling Your Jars
Once your beans have finished boiling, pull your jars from the oven, and (optional) add ½ teaspoon of salt to pints or 1 teaspoon to quarts. Ladle the beans into your warm jars using your canning funnel.
Fill the jars about ⅔ full and then top off with water, leaving one inch of headspace, which is basically just air left between the surface of the water and the rim of the jar.
Insert your headspace tool between the food and the side of your jar and scrape around the inside. This removes any trapped air bubbles that could otherwise create too much headspace.
Measure your headspace and add or remove any water as needed. Take a rag dabbed in vinegar and wipe around the mouth of the jar to ensure that it is clean of any debris. Pull a heated lid from your pot using your magnetized lid grabber and place it on the jar. Then tighten a band around it finger tight.
Finger Tight
“Finger tight” is a pretty subjective term. I struggled with this in my early canning days. If your band is not tight enough, the water siphons out. If it’s too tight, the oxygen can’t escape, causing the lid to buckle and preventing proper sealing.
The general rule of thumb is to tighten the band without holding the jar. When the jar begins to turn it’s finger tight. However, too much of my water always siphoned out of the jars. So now I tighten them finger tight plus approximately ¼” to ½” more, which has worked well.
Steam-Venting and Building Pressure
Once your canning water has reached 180 degrees, remove the thermometer and place your jars inside the canner. Secure the lid of the canner according to your specific canner instructions.
Gradually heat the canner until a steady flow of steam can be seen, heard, or felt. Many experienced canners tell you to observe the steam coming from the vent, but I’m rarely able to see the steam.
Instead, I’ve learned to monitor the sound. As the canner pressurizes, it gradually builds a steady rhythmic sound of rolling water, which is customarily how I know to proceed to the next step.
When your canner reaches a steady flow, let it continue for a full 10 minutes before dropping your weight or pressure regulator over the vent pipe. This ensures consistent temperatures throughout the inside of the canner. Only when you’ve covered your vent pipe will your canner gradually build pressure.
Getting the pressure gauge to the desired pounds per square inch (psi) takes much longer than I first anticipated, so don’t try to rush this process by adjusting your heat. Don’t be surprised if it takes 20–30 minutes to build up adequate pressure.
Maintaining a steady pressure is hard enough as it is, so the fewer adjustments you make to your stove temperature, the less your psi will fluctuate. Sudden temperature changes contribute to excessive siphoning and failed seals, so avoid this as much as possible.
Processing Your Beans
When your canner reaches the required psi, which varies depending on your altitude and the type of canner that you’re using, then and ONLY then can you begin your processing time.
Pint jars need to maintain the required psi for 75 minutes, while quart jars must maintain their psi for 90 minutes. It’s okay if your pressure fluctuates a little while processing, but minimizing it as much as possible yields the best results.
It’s important to monitor your pressure gauge throughout the entire process, so make sure you have sufficient time to dedicate to it. You should never start your processing and just walk away.
Whatever you do, don’t let your pressure fall below the desired setting. Otherwise, you’ll have to start your processing time all over again. For example, if your psi is 11 lbs, it’s okay if your gauge increases to 12 or 13 pounds, but if it ever falls below 11, then you must restart the timer.
Adjusting Temperatures
If you must adjust your temperatures when processing, a little goes a long way. It can be quite nerve wracking the first few times you use your canner, but with each attempt, the process becomes easier and you become more confident.
A helpful tip is to begin slightly increasing or decreasing your heat when your pressure gauge reaches 1–2 pounds more or less than your desired pressure.
The Cooling Process
Once your jars have processed for their required 75 or 90 minutes, simply turn your stove off and slide the canner off the hot burner, and walk away. Don’t remove the weight or gauge and don’t open the lid.
Allow the pressure gauge to drop completely to zero before removing the weight or opening the canner. The inside will still be hot, so lift the lid toward you to keep scalding steam away from your face.
Use your jar lifter to remove the jars and gently place them on a towel in a safe spot for at least 24 hours. Do not tilt your jars or turn them upside down. Your jars are not necessarily sealed at this point, so the less you handle them the better.
Do not attempt to adjust or remove the bands. Again, just walk away and come back in 24 hours.
When you first remove your jars, it’s normal to see bubbling because the food is still boiling from the high temperatures. Don’t panic if some of your water disappears. Loss of liquid won’t cause your food to spoil, but it may discolor over time.
However, if more than half of the water is gone, you probably want to go ahead and eat it within a few days. Likewise, if any jars didn’t seal, you can eat the food, freeze it, or reprocess it.
Test Your Seals
Once your jars have cooled, remove the bands and test your seals. First, visually inspect the lids. They should be concave, and you should be able to press on them without the lid moving or popping upward.
Next, try to lift the lid with your fingertips. If the lid does not flex up or down and you can lift the jar off the counter by its lid, your lid has a good seal. You can also do a tap test with a spoon. If your lid tings instead of thuds, it’s likely sealed.
Preparing Your Beans for Storage
After you’ve verified all your lids have been sealed, take a damp cloth and wipe down all your jars to make sure there is no residual debris or stickiness on them.
Be sure to label all your jars with their contents and the date they were processed. Place them in a temperature-controlled area for storage.
Never leave your rings on your jars, and never stack your jars. If you have false seals, eventually mold growth will pop the lids off, letting you know your food is no longer safe. If you have something weighing your lid down, it won’t be able to pop off.
How Long Will Your Beans Last?
As long as your seals remain intact, your jars of beans last indefinitely. The beans will never go bad. Like all foods, however, they lose their nutrients over time, just like dried beans do.
In regard to food quality, the NCHFP recommends one year. However, Elizabeth Andress (1:15:45), a spokesperson for NCHFP, elaborates that just like commercially canned goods, you’ll see some deterioration in quality, but that doesn’t mean it’s not edible.
Chances are you haven’t stored your food just to look at it. So as long as you’re continually rotating your food reserves, you really shouldn’t have any concerns about long-term storage and food quality.


 Uses And Benefits")

 NSN: 1240-99-984-0230")
