
Greens powder is all the rage these days.
You’ve likely seen advertisers touting it as the latest cure-all on social media, but this nutritious supplement isn’t just another fleeting fitness fad. When used correctly, it can be highly beneficial.
A well-made greens powder delivers your daily dose of plant-based vitamins and minerals in a shelf-stable powder that lasts way longer than actual greens. This makes it a perfect DIY project for foragers who want to stay nourished during the barren winter months when fresh plants are unavailable.
Read on to learn how to make a natural foraged greens powder the smart way, including tips for choosing healthy plants and preparing them for optimal nutrition retention.
Materials for Making Foraged Greens Powder
Making a greens powder isn’t complicated, but it is time consuming.
Foraging for plants is a process that can take days, weeks, or even months. Drying them can also take a while, especially if you don’t have a dehydrator.
I usually gather greens as soon as they pop up, dehydrate them, then store them dried until I’m ready to make the powder. Here’s what you’ll need to get started:
- Plant matter: Plants infuse your powder with life-giving vitamins and minerals. You can include any nutritious treasures you forage, including greenery, wild fruits, and fungi. If you’re unsure where to begin, I’ve compiled a quick guide on choosing plants for greens powder below.
- Dehydrator: A dehydrator lets you dry your plants quickly and efficiently for powdering. (I use the Nesco Snackmaster Pro.) If you don’t have one, you can air-dry the plants instead. Unfortunately, drying plants in your oven isn’t an option when making a greens powder. It can destroy essential nutrients, like vitamins A and C.
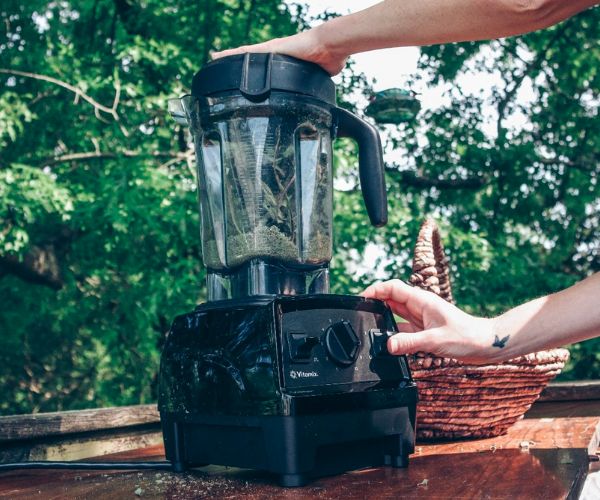
- Blender: Once your greens are dry, you’ll want to blend them into a fine powder. You can do this with any blender, food processor, or herb grinder. Since greens are so soft, you might even get away with a mortar and pestle.
- Storage container: Your storage container allows you to enjoy fresh foraged greens powder all winter. Ideally, you want something like Mylar bags, which allow for long-term storage. If you have none available, you’ll be fine using airtight mason jars, Tupperware, or Ziploc bags.
How to Choose Plants for Greens Powder

Remember that foraging is a location-specific hobby. Not everyone can forage for the same items since different climates and regions have different wild plants. It’s essential to research your area to see what grows there.
Familiarize yourself with the nutritional content of each plant, then examine your own health history and dietary needs to determine what plants to include in your greens powder.
Micronutrients Matter
There are certain nutrients we lack during the wintertime. These include vitamins D, C, and A, and minerals zinc and iron. Focusing on these nutrients will help you stay healthy and happy during the colder months. Here are some commonly foraged plants that can check all your winter nutrition boxes:
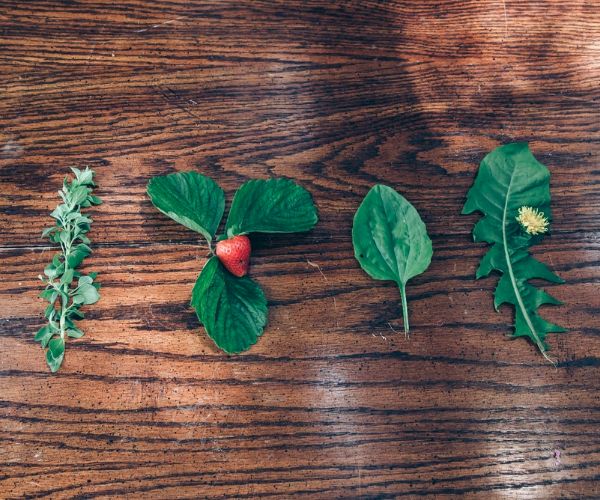
- Dandelion: Dandelion greens and flowers grow all over North America in the spring and summer. They pack a powerful punch of vitamins and minerals, including vitamins A, C, K, and E, folate, iron, magnesium, potassium, and calcium.
- Plantain: There are many varieties of plantain, most cropping up in early spring. This common edible weed contains beneficial calcium and vitamins A, C, and K.
- Strawberry: Wild strawberries appear during spring and summer. You can dry and powder the fruit and leaves for a hearty dose of vitamins C and K, along with folate and carotenoids.
- Burdock: You can forage burdock in the fall or spring, harvesting both roots and leaves. Burdock root can add valuable zinc to your greens powder and a healthy dose of iron, magnesium, and manganese.
- Purple dead nettle: Forage early in spring to reap the rewards of purple dead nettle, which delivers a healthy dose of vitamins C and A along with iron.
- Mushroom: Many mushrooms contain essential fatty acids to protect skin and hair during winter. They’re also one of the only wild edibles with much vitamin D, so including them is crucial for a well-rounded greens powder. You can forage various types during different seasons.
This short list may give you some ideas, but don’t let it limit you. The natural world is your oyster when it comes to foraging, and you’ll find all sorts of fascinating edibles around you with persistence and a pinch of luck.
How to Make Foraged Greens Powder
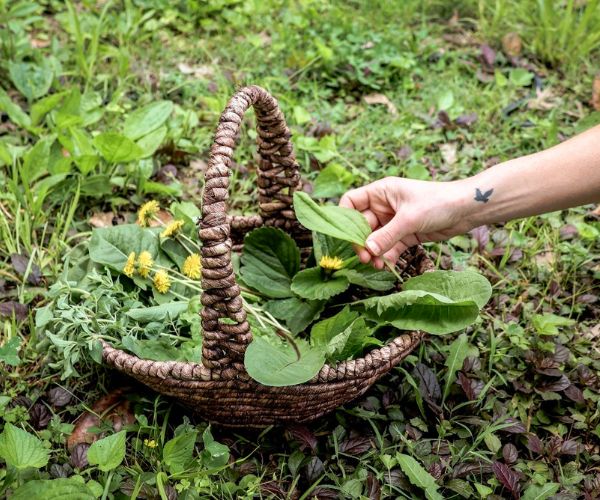
1. Harvest Plants
Once you’ve decided on your desired cocktail of plant matter, head outdoors and gather up as much as you can harvest sustainably. It may seem like more than you need, but plant shrinkage is no joke.
Once those puppies dry, they’ll only be a ghost of their former selves. Mushrooms and fruits will retain a bit of body and bulk, but leafy greens will practically disappear. And since you’re making medicine, more is better.
2. Prepare Greens
When making a greens powder, it’s unnecessary to trim the plants exactly like you would for tea or salad. There are often lots of nutrients in the stems, so you can leave them in place unless they’re foul tasting. The texture won’t be an issue since you’ll grind everything down to powder in the end.
Cut away rotten or inedible bits first. Then, clean them off by wiping away dirt and debris or submerging them in water.
It’s essential to clean them properly, but that process varies depending on the type of plant you’re working with. Check out our guide to cleaning foraged plants for more detailed instructions on how to clean specific types of foraged edibles.
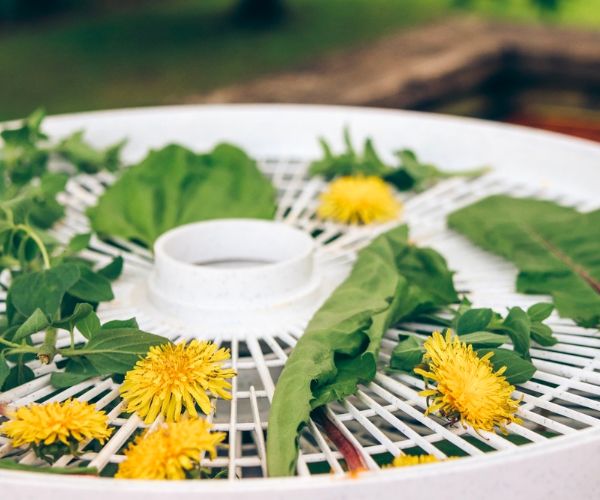
3. Dry Plants
Break out your dehydrator and arrange the plants a few centimeters apart on the trays. I dehydrate at 110° F for two to three hours, but it’s wise to follow the drying directions on your specific unit. Mushrooms, berries, fruit, and roots take longer to dry than greens.
If you don’t have a dehydrator, drying your plants will take much longer.
You can hang them up in clusters or arrange them on paper towels to air-dry. Depending on the water content in your plants, they could take five to seven days to dehydrate fully.
Greens, mushrooms, and roots are fine to air-dry, but fruit tends to rot. Unless you can place it in direct sunlight, omit fruit when air-drying because it will likely spoil.
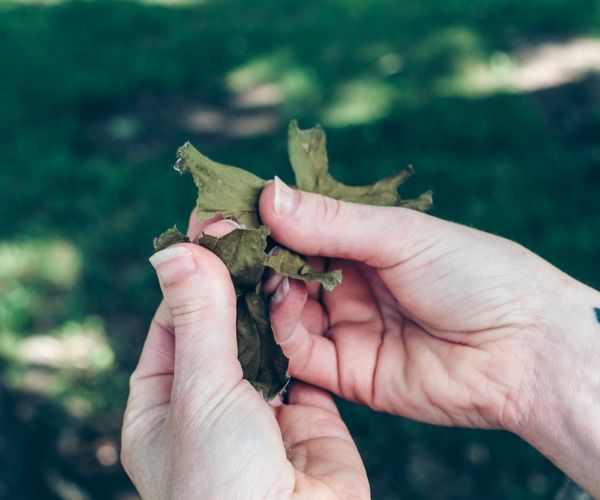
4. Check and Remove
If you’re using a dehydrator, check plants after an hour. They’ll probably take longer, but it’s important to get a handle on how they’re doing and note it for next time. You don’t want to over-dry them because it can sap their nutrients and defeat the whole purpose of a greens powder.
Air drying is much more forgiving since it doesn’t use direct heat. Whatever method you employ, the plants are ready when they crumble and crack easily in your hands.
4. Powder Plants
Once everything crisps up nicely, it’s time to grind it into a fine powder. I use a blender, though you can use a food processor or herb grinder.
You might need a more powerful machine if you included fungi or fibrous fruits and veg. These plants are difficult to blend when fully dry.
Start with the toughest plants first. I usually powder mushrooms completely before adding anything else because they take so long.
Read: How to make turkey tail powder
Add fruits second, flowers third, and the actual greens last. Take plenty of breaks to rest the engine because it can quickly wear out on tough plants.
If you don’t have a machine to powder your mix, you can use a mortar and pestle. This requires a lot of elbow grease, and unless you’re fully committed, it’s best to avoid using mushrooms with this method. They could take all day.
5. Store Properly
Once you have a very finely ground powder, you’re ready to store it for winter.
You can vacuum-seal it, use Mylar bags with oxygen absorbers, or use a Mason jar for easy access. The idea here is to store your greens powder for a few months until you need it, not for years. As long as you have an airtight container, it shouldn’t lose much potency in such a short time.
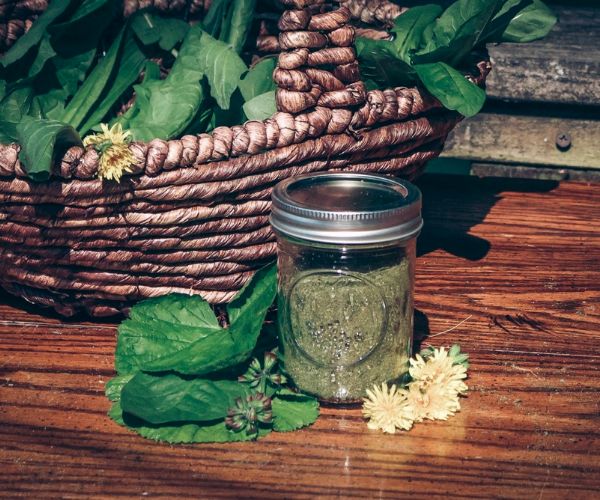
During the winter, you can use your foraged greens powder in all sorts of recipes. Add it to hearty cold-weather soups, breakfast smoothies, or even bake it into fresh bread loaves for a splash of color and extra nourishment.
Now that you know how to make a basic greens powder, you’re ready to hit the forest for some foraging today!


 Uses And Benefits")

 NSN: 1240-99-984-0230")
