
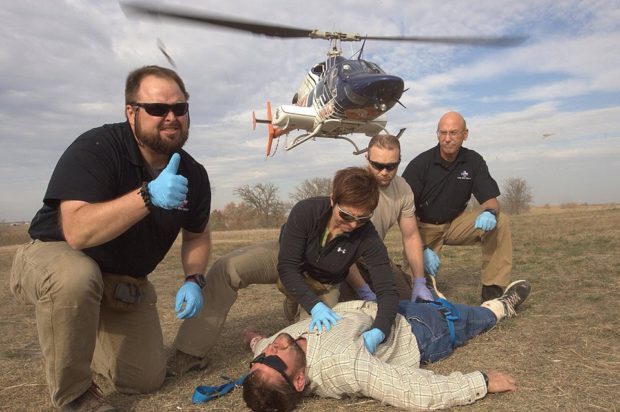
This is a guest post from Caleb Causey, owner of Lone Star Medics. Caleb is an experienced Army medic who provides top notch trauma medical training to law enforcement agencies and armed citizens alike. Caleb intended this article to be a list of potential medical training scenarios for police roll-call training sessions. These drills are more than that. They are appropriate for anyone who wants to improve their trauma medical skill set. Use them in your training groups, formal classes, or even during your IDPA matches. Do them regularly and I will guarantee that they will save a life.
-Greg
We all know there are not enough hours in a day to accomplish everything we need to do. Training, let alone time for training always seems to be kicked to the side when there are more important issues to deal with. So I’ve created a series of short, simple, fun, and educational training drills that you can perform during any other scheduled training, roll call, or down time that your officers may have while on duty together. Most of these are designed to be utilized during roll call before the shift and in the briefing room; but can be augmented for any time there are two to five minutes available.
Drill #1 “Bump In The Night”
Turn off the lights, make four officers locate a “downed officer”, put tourniquets (tq) on that officer’s arms and legs while they are surrounded by tables and chairs to get in the way… in low light setting.
Equipment Needed:
– One officer acting as the role player (the patient), it should be kept confidential which officer is designated as the patient until the drill starts.
– One officer acting as the instructor or “time keeper”, this should not always be the highest ranking officer in the room. The brass needs to practice as well.
– Four TRAINING tourniquets, not real-world tourniquets; handed to each of the four officers and stored in their real-world tq carrier/holster. If no carrier/holster on their uniform, the officer must secure it tucked up under their duty belt tightly; no half-ass’ing it.
– Four officers in full duty uniform, ready to hit the streets (rescuers) chosen at random.
– A few tables and chairs, the more the merrier.
Tasks:
– Under low-light or no-light conditions; have the four officers locate the role playing officer (the injured officer), identify the location of “bleeding” (it will be both arms and legs), and deploy/apply a tq to appropriate limbs.
– To start the drill; the “time keeper” kills the lights and the role player immediately quickly lays down on the floor under the chairs and desk they were just at. The time keeper then yells out the role player’s last name within a second or two of the lights going out. This allows the four rescuers to know who the injured officer is.
– As soon as the name is yelled; the rescuers must locate the correct officer that is injured and deploy and apply a tq to that officer’s respected arms and legs… in the dark… under all the furniture… with a time limit unknown to them.
Standards:
– Time to locate patient… No time limit requirements
– Time to identify injury – 60 seconds (The Lone Star Medics’ standard to perform a blood claw/rapid physical assessment of immediate life-threatening injuries is 60 seconds.)
– Time to deploy and apply a tq correctly – 12 seconds (LSM standard to deploy and apply a tq; including self-aid or buddy-aid.)
– Role player is alert and speaking (preferably yelling for help and panicking) for first 7 seconds once lights go out. After that, they are to slump over and go completely limp and cannot speak.
Drill # 2 “Vehicle Bottle Neck”
During the next SWAT training, the next time the team begins their raid from inside the SWAT truck/vehicle; have the first two officers go down immediately as they exit the back of the vehicle. Have those two officers lay down right in the way of the other exiting officers. Observe and take note of their reactions.
Things to look for:
– Did the other officers get caught up in the doorway and create a “fatal funnel” there at the truck?
– Did anyone perform a manual drag and drag the two downed officers out of the way and fall back into their stack?
– Did anyone stop and start rendering aid on the “X”?
– If aid was rendered, did responding officers use their own tq or the downed officer’s tq? Why or why not?
There are several goals to this simple drill:
1. If the first two officers get injured, can the other officers still carry on with the mission and pick up the slack of losing those two officers? Can the team adapt and overcome in order to complete the mission?
2. Make sure the team is trained up on manual drags and carries.
3. Make sure each officer has a quality tq as part of their uniform, and that each officer knows where the tq is located on each other’s uniform.
4. Make sure officers know how to deploy and apply those tq’s and know whose tq to use on who.
Drill # 3 “Stacking Chairs”
Have one officer lay down on the floor, face up or down (more difficult), and in a spread eagle. Place one chair over each arm, leg, torso, and head of that officer. Then have other officers sit down in those chairs (so the chairs don’t move during the drill.)
On the command “GO”; have officer(s) under the chairs deploy and apply their own tq (using a blue training tq) to their own arm or leg. Par time is 12 seconds (LSM standard)
Reset the officer’s tq and have them perform the drill on each arm (one handed only) and on each leg (both hands allowed). Par time for is 12 seconds to deploy and apply a tq to yourself or someone else.
Not only is this drill teaching officers how to deal with the potential for confined space application of a tq, such as in a car wreck scene; it also is humorous to watch each other struggle as they train. Which brings humor into training, which is always a good thing every now and again. “Verbally motivating” each other is highly encouraged as well during the drill.
Added stressors such as pepper spray, low light, water hose, gas masks, or whatever you think is appropriate are also highly encouraged during this drill.
You can do this same drill at home under your own bed.
Drill # 4 “Talk to me, Goose!”
Items needed:
– Two hand held walki-talkies
– One BLUE training tq
– One person with no formal tactical medical training (could be a civilian from the front office); this will be the patient.
Place one officer in a closed, separate room with one training officer and a walkie-talkie.
Place the other walkie-talkie at the front of the briefing room. No one (including the untrained person) is allowed to touch that walkie-talkie. No one is allowed to talk in the briefing room. Have the untrained person (the patient) join the officers in the briefing room. They are not allowed to ask anyone in that room any questions or receive any help or advice… except from the person on the other walkie-talkie.
The objective is to have the officer in the separate room communicate to the untrained person how to apply a tq to one of the officers in the briefing room using only the walkie-talkie to communicate their directions.
Training officers may allow only one-way communication or two-way communication between the separated officer and the untrained person. Either way, chaos will be created. Lol
This is great for negotiators to train on as well as the rookie on the department. We call this type of medicine… “Treatment over barricade”.
Drill # 5 “Blind Blood Claw”
The objective here is to have one blindfolded officer perform a blood claw or some sort of rapid trauma assessment on another officer. Locate that injury, treat it, and continue assessing for more injuries… while blindfolded.
Have each officer pair up with another officer.
First officer is blindfolded and must perform a complete blood claw of the other officer under 60 seconds.
This is all done while the officer is either in a vehicle, on the floor laying down in the briefing room, or wherever is feasible. Start out with plenty of room for both officers, then as they progress, make the space smaller for them to perform the drill.
The blindfolded officer must locate the injury within 60 seconds.
In order to produce a simulated injury, you can either pour water on the injured officer’s uniform (to simulate a wet feel, as if it were blood) or by having the injured officer flinch and yelp once the blindfolded officer physically touches that “injured area” on the body.
The blindfolded officer must use their buddy’s tq first, then their own IF a secondary injury is found/needed.
Drill # 6 “Holy Shirt”
The next time you’re at the shooting range, throw a couple of old t-shirts (3XL size) over a couple of targets you’ve been shooting at all day. Shoot one or two holes in random spots on the shirts. The next training day or at roll call, throw the shirts on a couple of officers. Just make sure that this is done where no one can see what is going on. You may opt to have the officers remove their uniform shirt and place these shirts UNDER their body armor. Up to you how difficult you want to make things.
Have the dressed up officers lay down and be quiet and go completely limp. Have the rescuing officer enter the room and find the bullet holes using the blood claw (or whichever trauma assessment you teach at your agency) within 60 seconds. You can run several officers through at one time or have them pair up.
After the rescuer locates the bullet hole(s); have them treat that injury with a training IFAK.
A training IFAK can be made using the following contents:
– Training tq. Both SOFT T Wide and CAT both come in Trainer Blue.
– Ziplock baggie filled with a roll of Kerlix gauze acquired from the FD. This can be labeled as “hemostatic agent.”
– Olaes Modular Bandage or Emergency Bandage (Israeli bandage); just roll it back up and reuse it over and over. Store it in a ziplock baggie as well to help preserve it.
Drill #7 “Drive Through”
Have an officer (patient) get in their patrol car and buckle up. Close and lock the doors but leave the windows down. Doors are not allowed to be opened. The patient is unconscious and unresponsive, seated in the driver seat with seatbelt on.
Have another patrol car parked right up next to the patient’s patrol car. Right up next to the driver side door; as if they were pulled up next to each other, facing opposite directions and shootin’ the breeze. There should only be a few inches between each car.
On the command “GO”; rescue officer must deploy and apply their own tq to themselves while seated in their car. Once tq is applied correctly; the rescue officer must deploy and apply the other officer’s (unconscious officer in other car) tq to that officer’s right leg. This can simulate a car wreck, a trapped officer, and is good practice for a bad day.
You can also put two officers in the same car in the front seats, both with seatbelts. Driver is the unconscious patient and needs their tq applied to their left leg. Rescue officer in the passenger seat must stay in their seatbelt yet still deploy and apply their own tq first while seated.
Drill # 8 “Easy Money”
Not that we would ever “gamble” in uniform, on duty, or down the hall from the Chief’s office… but we are.
Everyone places a dollar in a jar and the jar is placed up front in the briefing room. Training tq’s are handed out and stored as they are carried in uniform. For those officers that don’t carry a tq on duty; their tq’s are staged in their patrol car in the trunk (trunk closed up, no cheating).
On the command “GO”; officers must deploy and apply a tq to their own RIGHT arm using a one-handed technique only. Those officers with staged tqs in the trunks of their cars must retrieve their training tq from the trunk and return to the briefing room prior to applying it to their RIGHT arm.
The first two officers that applied the tq within 12 seconds and done correctly; split the cash. If gambling is not allowed, then the slowest two officers buy the two winners lunch that day.
The point of all this is to give officers and their leaders a few ideas on some quick, hip-pocket type training.
Obviously these drills do not replace actual training nor do they prepare officers for every scenario they may face on the streets. Several agencies may already perform drills similar to these and that is great! Please continue to do so and share with others what type of drills you have implemented. I’d like to take this opportunity to say “Thank You” to all those men and women in blue that put it on the line every day. Y’all keep your heads up and know that there are a lot of us out there rooting for you.
Drink Water,
Caleb Causey, Lone Star Medics
* Some of the above links (from Amazon.com) are affiliate links. If you purchase these items, I get a small percentage of the sale at no extra cost to you.
Liked it? Take a second to support Greg on Patreon!


 NSN: 1240-99-984-0230")
