
Knowing how to create a fire is one of the most necessary survival skills. It will serve you well in every aspect of life, whether lighting the charcoal grill for holiday burgers and hot dogs or a life-or-death situation.
What you may not know is that not every fire is right for every circumstance. By learning the differences, you can build a fire in any situation, and you’ll never be without a flame when you need one.
Types of Fires
There are three main uses for fire:
- Warmth: A tepee shape or lean-to design directs heat in a specific direction.
- Cooking: A small and hot ember base maintains a more consistent heat.
- Signaling: Any fire can do this, but the larger the better for ready visibility.
1. The Log Cabin
Warmth | Cooking | Signaling
This fire structure resembles a log cabin, with logs placed in a criss-cross manner. Choose this construction style if you have an ample wood supply and need a way to rest a cooking pot over your fire.
Use the following steps to create a log-cabin fire:
- Carve out a small trench.
- Lay two parallel logs, leaving a space between them to provide airflow.
- Lay two logs perpendicular across the ends of your base logs.
- Using smaller twigs, build a platform between your end logs.
- Add tinder and kindling on the platforms as you build your structure.
- Light your fire.
2. The Tepee
Warmth | Cooking | Signaling
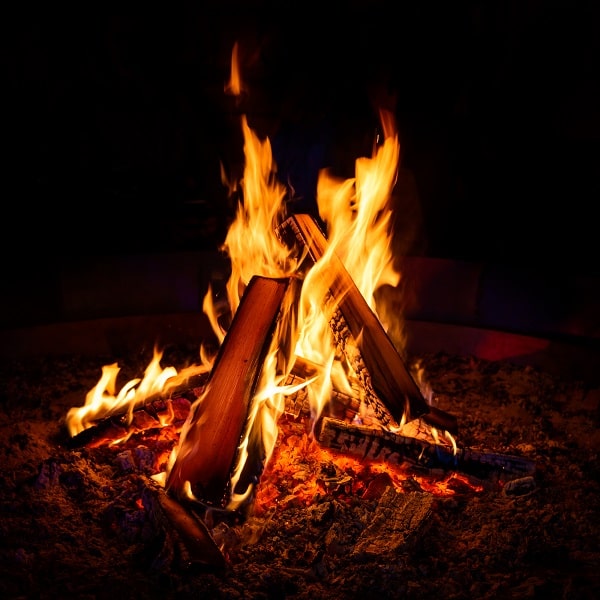
The tepee structure is one of the most common types of fires. It is relatively easy to put together, doesn’t require a lot of firewood, and lights quickly.
- Place the tinder and kindling in a small pile in the center of your fire area.
- Lean larger logs on end with the tips meeting in the middle to form a tepee.
- Fill in around the tepee with smaller sticks.
Be sure to leave plenty of space for airflow to help your fire burn.
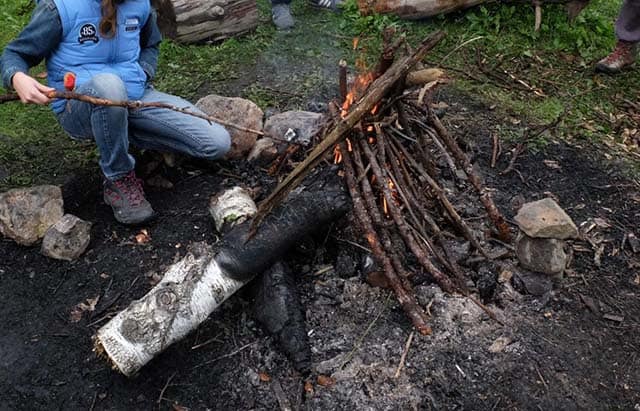
3. The Star
Cooking | Signaling
The star fire is a great option if you have a low wood supply. This small fire will provide a lower volume of heat but will burn your logs slower.
- Place your kindling and tinder in the center.
- Lay your fuel logs in a star pattern around your starting materials.
- Light your fire.
- Push your fuel logs toward the center as they burn.
4. The Lean-To
Warmth | Cooking | Signaling
This style of fire is great for windy days. It resembles a lean-to, with an angled “wall” on the leeward side of the wind.
- Start with a larger log, about four to six inches in diameter.
- Place tinder and kindling inside the structure near the base log.
- Lean sticks against the base log, over the tinder and kindling.
- Light your fire.
5. The Upside-Down Pyramid (Top-Down Fire)
Warmth | Cooking | Signaling
If you’re building your fire on wet or snow-covered ground, creating an upside-down pyramid or top-down fire might be helpful. This fire style burns slowly and is relatively easy to construct and light.
- Start with two larger logs (two to four inches in diameter).
- Lay a second layer of logs across the base logs, similar to the log cabin-type fire.
- Lay a third layer of smaller logs or sticks (one to two inches in diameter).
- Add tinder between the logs as you build.
- Use slightly smaller logs for each layer.
- Add more tinder and kindling to the top of your pyramid.
- Light your fire from the top.
This type of fire will burn a long time and is very low maintenance.
6. The Trench Fire (“T” Fire)
Warmth | Cooking | Signaling
A trench fire is quick and easy to build and works excellently in open-field settings that might be a little breezy.
- Start by excavating a shallow trench in the shape of the letter “T”.
- Fill the trench with tinder and smallish kindling.
- Add small fuel logs until you have a good bed of embers.
- Replace your firewood as it burns.
7. The Keyhole Fire
Warmth | Cooking | Signaling
The keyhole fire will produce warmth and create an area to prepare a meal.
- Begin by digging a hole for your fire.
- On one side, add a rectangle trench for hot coals.
- When you’re ready to cook, shovel coals into the rectangle area.
- Your cooking pot should rest on the ground over the rectangle.
- Build and light your fire.
This fire resembles an old-style keyhole. Any fire will work if it produces embers, which you use for cooking.
If you accidentally make the rectangle too wide for your cook pot, don’t fret. Set several small twigs across the rectangle’s width to support the weight of your pot over the bed of coals.
8. The Long Fire
Warmth | Cooking | Signaling
The length of this fire style makes it great for warming several people or cooking for larger parties.
- Begin with two long logs, each about the same diameter.
- Place them parallel to each other, leaving space between them.
- Add tinder and kindling to the space between the logs.
- Gradually add larger fuel as needed.
- Use the base logs to hold your cooking pot above the heat.
9. The Deflector Fire
Warmth | Cooking | Signaling

A heat deflector on commercially available fire receptacles is a metal plate that sits above your fire to deflect the heat outward. When building a survival fire, you can use the same principle to direct the warmth of your fire by building a wall using sticks and other available building materials.
This technique can be useful to direct the heat created by a variety of fires we have discussed, including:
- Log cabin fire
- Tepee fire
- Top-down fire
- Trench fire
- Keyhole fire
- Long fire
It will not work well with the Dakota fire hole. If used with a Swedish torch, you would need to build the deflector wall taller than the torch as the primary heat is in the top, center area of your log.
You can build a small wall behind your fire to point the heat toward a lean-to structure to keep you warm while sleeping. This fire can also be helpful for a cooking fire, as it holds more heat in your cooking area.
10. Dakota Fire Hole
Warmth | Cooking
The Dakota fire hole is a win-win when you need a fire that produces very little smoke and light but plenty of heat for cooking. Anyone who spends any amount of time outdoors in rustic settings should know how to construct this fire. The fire is concealed underground, making it less visible while remaining easy to maintain.
- Dig a hole around one foot in diameter and about one foot deep.
- On the upwind side, dig a smaller, angled connecting hole.
- The second hole should be about 10 inches from your larger hole.
- Add tinder and kindling to the larger hole.
- Light your fire and add your fuel logs.
The purpose of the second hole is to allow airflow to the base of your fire.
11. Swedish Fire Torch
Warmth | Cooking | Signaling
The Swedish torch is another very efficient cooking fire. Like the fire hole above, constructing it is labor intensive and requires tools but will cook your meals quickly. There are different ways to make a Swedish torch. The first involves an auger (large-bore drill) and a chainsaw.
- Use the drill to create a hole in the center of your log.
- Drill in from the side to intersect the center hole, making an air intake.
- Cut down through the log part way in a criss-cross manner with the chainsaw.
- Place your tinder and kindling into the hole and light your torch.
The second method uses a standard ax.
- Quarter your log.
- Remove the center portion of each quarter.
- Set that aside for kindling.
- Reassemble your log.
- Use a piece of wire to hold it together, or put the base into a shallow hole and pack dirt around it.
- Place tinder and kindling into the center gap and light your torch.
Make sure to leave air gaps between your quarters to maintain airflow. A Swedish torch will burn for quite some time. If you use it solely for cooking, you can knock it apart and let the fire go out to conserve your wood. When you need another meal, reassemble your torch and relight it.
Fire-Building Basics
Specific techniques are the same regardless of the type of fire you are building. Every fire needs tinder, kindling, and firewood (fuel).
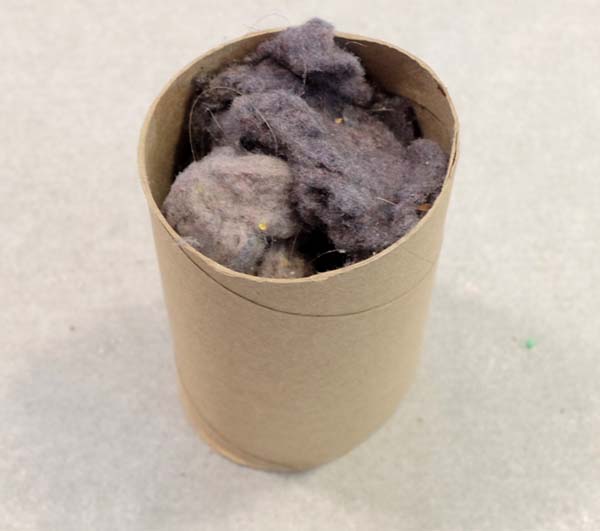
Tinder is light, dry material, such as leaves, small twigs, pine needles, or materials you carry, such as steel wool or dryer lint. Used dryer sheets are also quite flammable and will work great with other tinder.
Kindling consists of small sticks, typically less than one inch in diameter. A good measurement is to look for sticks slightly bigger around than your thumb. Firewood is your fuel, and larger pieces will supply the heat to your fire and keep it burning.
Build your fire starting with tinder, then kindling, then your larger logs over those. When you light your tinder, it will burn fast, igniting your kindling. The kindling should burn long enough to start your larger pieces burning. Fanning the embers (introducing more air) will create a hotter fire or serve to get your logs burning faster.
Your Fire-Starting Tool Kit
Depending on your circumstances and personal preferences, your fire-starting kit may be a lighter, matches, or a flint and steel. We cover a variety of fire-starting tools in our articles on 29 Homemade DIY Fire Starters and How to Start a Fire Without Matches or a Lighter.
If you maintain a bug-out bag, you already have at least one method to light fires. My recommendation is to carry at least three different fire-starting tools. It might seem like overkill, but if one fails, the others will get the job done.


 Uses And Benefits")

 NSN: 1240-99-984-0230")
